The core technique
How to tuck fabric into Kinusaiga grooves
A practical tucking technique for foam board Kinusaiga: cutting each piece with allowance, working in a sensible order, and handling curves, corners, points and small pieces.
About 10 minutes
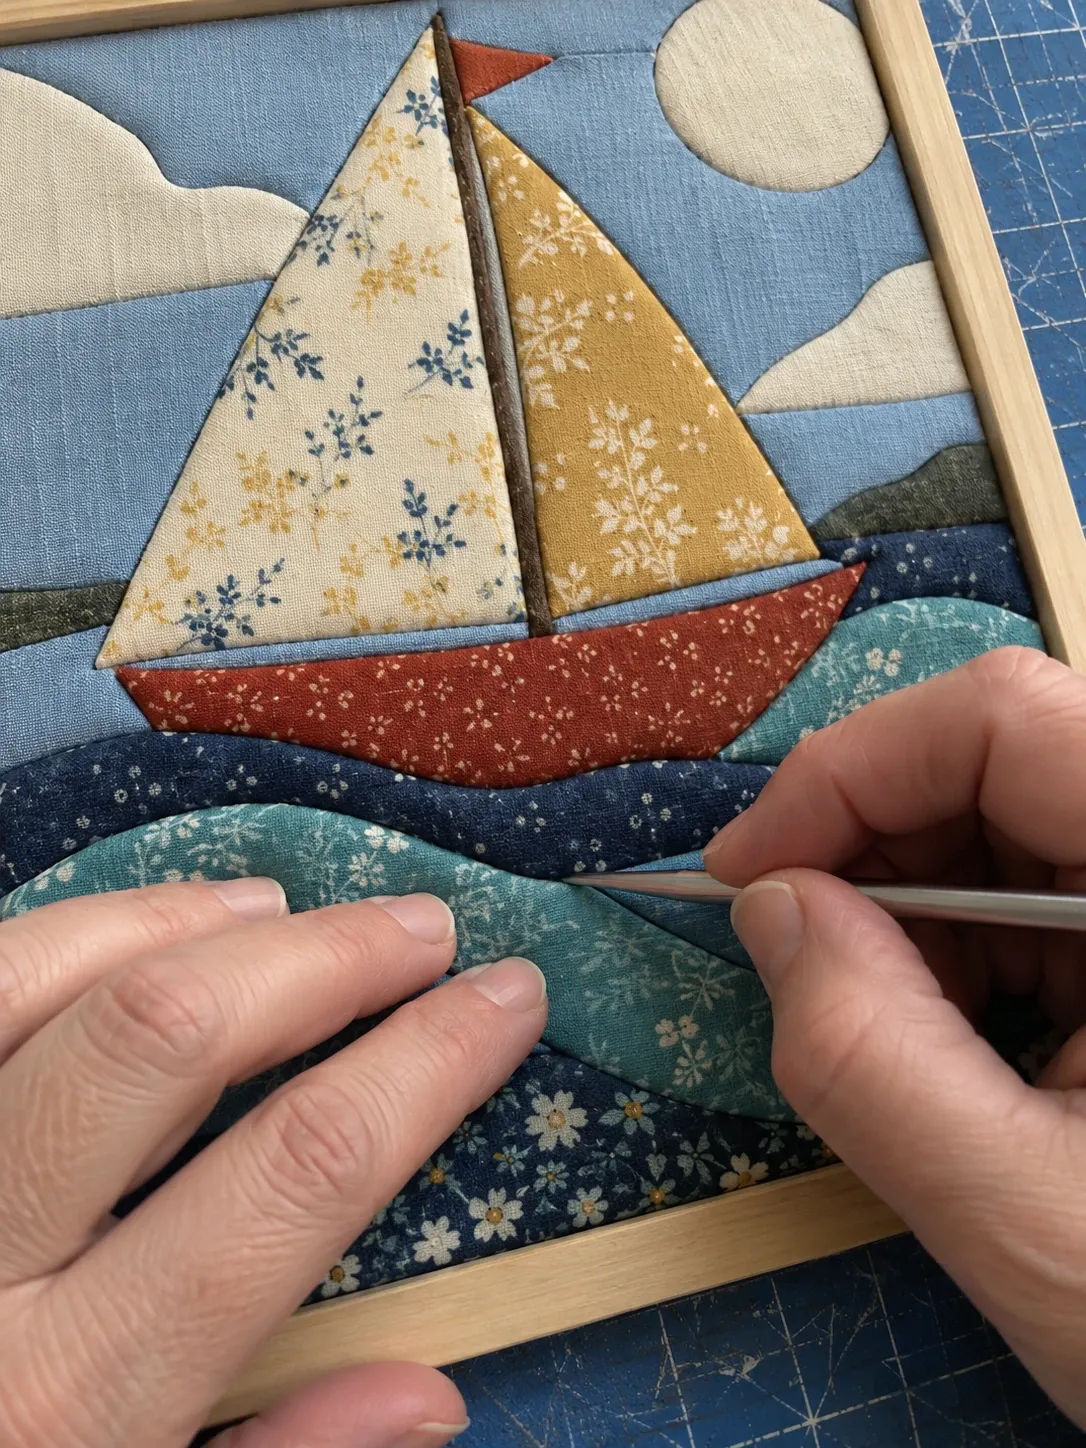
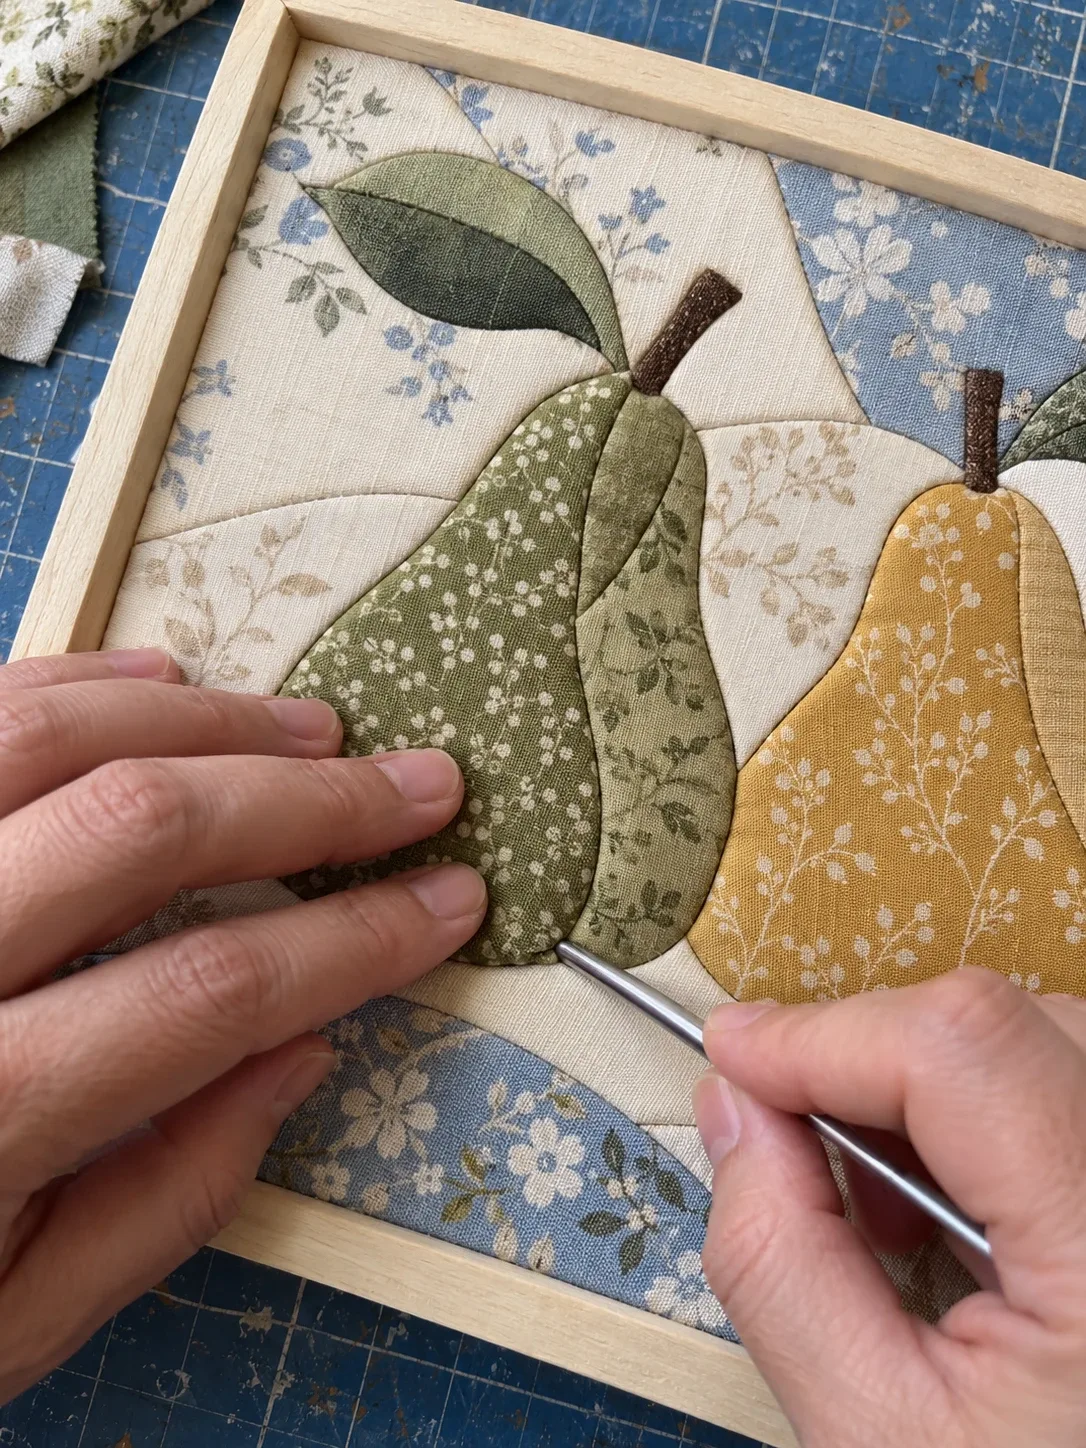
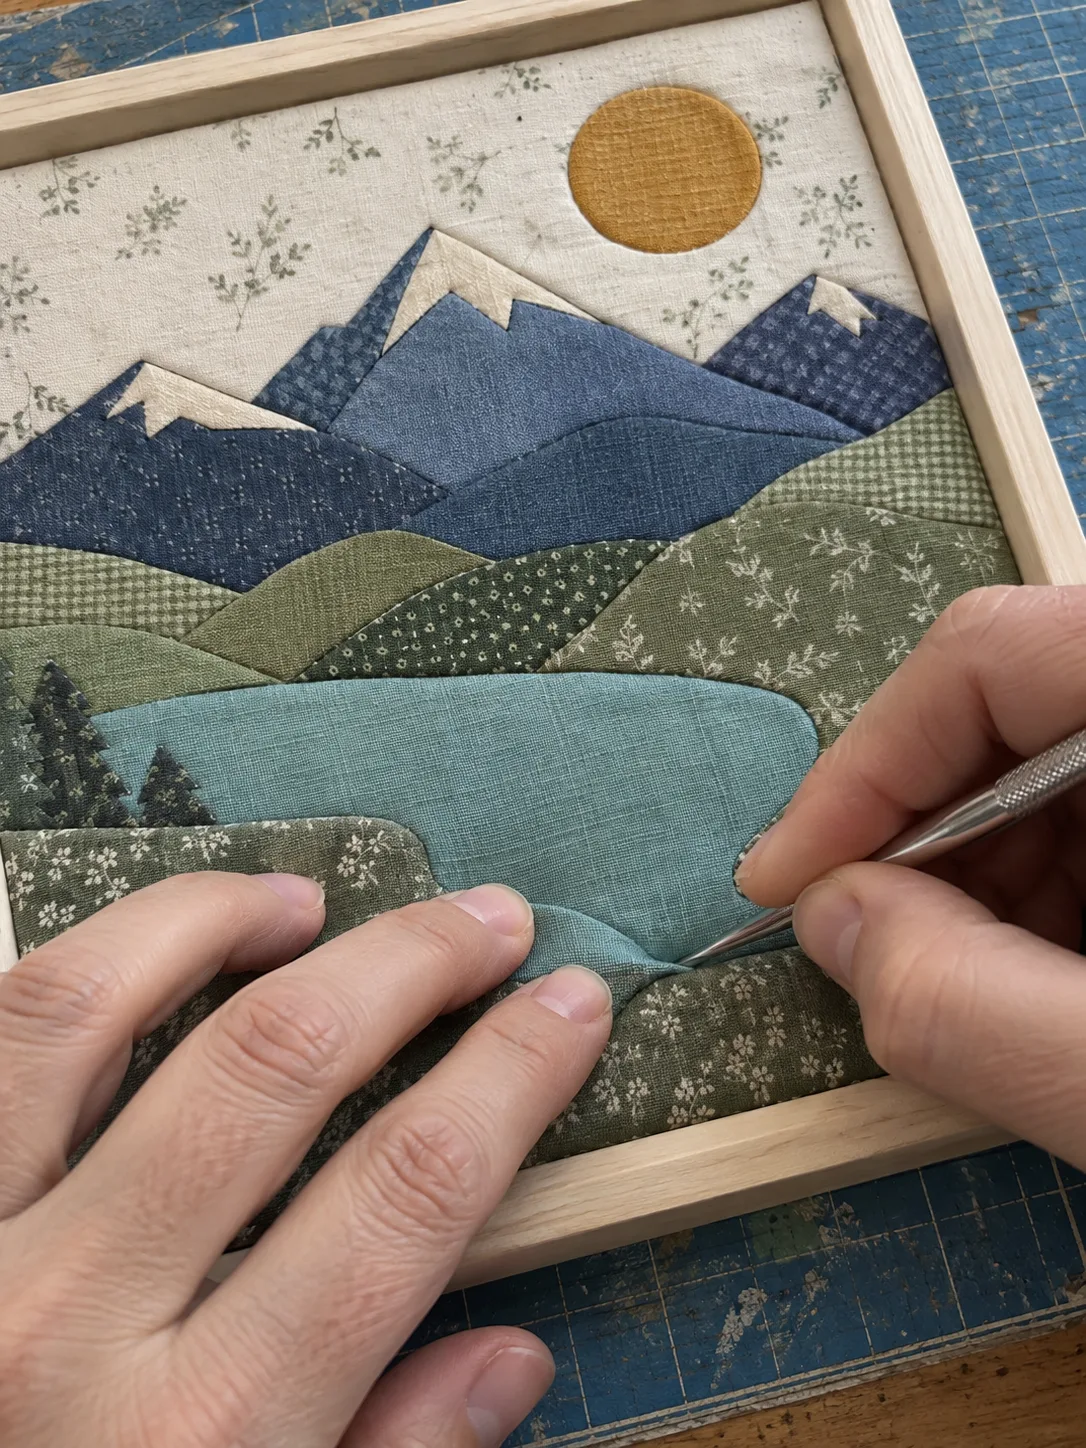
Tucking is the moment Kinusaiga becomes fabric art. Until then you have a board with lines in it. Once the first piece is pressed into its grooves, the surface starts to look like a picture made of cloth instead of a drawing.
The motion itself is simple. You lay a piece of fabric over a section of the board and push its edges into the surrounding grooves with a blunt tool. The difficulty is doing it so the fabric stays flat, the edges stay hidden and the neighboring pieces still have room. This guide explains the decisions behind a clean result.
Cut each piece with an allowance
A fabric piece must be larger than the visible section it covers. The extra cloth around the edge is the part that disappears into the groove. Without it the fabric only rests on the surface and pulls out the first time you press a neighbor.
The generator adds this allowance for you on its fabric cutting sheet. It starts at 6 millimeters around every piece and you can change it between 3 and 15 millimeters. A shallow groove or thin cotton needs less. A deeper groove, thicker cloth or a beginner who wants room for small corrections benefits from more. Trimming extra cloth is easy. Adding it back is not.
Pick a working order before you begin
The order matters because each groove is usually shared by two pieces. The first fabric goes in, then the second fabric goes into the same cut beside it. A sensible order keeps the visible edges clean and prevents you from tucking into a groove that is already full.
- Work from what sits visually behind toward what sits in front. A sky goes in before the tree that stands in it.
- Within one area, place larger calm pieces before small details. Eyes, highlights and tiny accents go in late, when the surrounding fabric is already stable.
- Leave the outer background until near the end. It often has the longest edges and benefits from a board where everything else is already secured.
- Keep the numbered print beside you and tick off each piece as it is finished.
There is no single correct order for every picture. What matters is that you decide it before you start instead of reaching for whichever color is nearest.
The basic tucking motion
- Lay the cut piece over its section and check that the allowance reaches every groove.
- Start on a calm straight or gently curved edge, not at a corner.
- Hold the blade or tool at a low angle and push a short length of the edge straight down into the groove.
- Secure a second short length on the opposite side of the piece. This anchors the fabric without twisting it.
- Work around the piece in small steps, smoothing the cloth toward the edges as you go.
- Trim excess only after most of the edge is held. Then push the trimmed edge fully into the groove.
Short movements are the key. Long strokes drag the fabric along the groove and create diagonal wrinkles. Many short pushes keep the weave square and let you correct tension as you move around the shape.
Use the right tool for the job
Curves
Fabric does not bend into a curve the way paper does. On an outward curve, such as the edge of a circle, the allowance has more cloth than the groove can take and it bunches. On an inward curve it has too little and pulls tight.
Work curves in very short steps and ease the cloth in gradually. On a tight outward curve trim the allowance a little narrower so less cloth has to fit. On a tight inward curve you can make a few small snips into the allowance so it can spread. Stop every snip well before the line that will be visible.
Inner corners
An inward corner is the place where a piece wraps around a point of its neighbor, such as the notch between two petals. The allowance cannot follow the corner without being cut. The generator marks these places with dashed relief cuts on the fabric sheet. They stop 1.5 millimeters before the groove so the cut never reaches the visible edge.
Cut along the relief line, then tuck each side of the corner separately. Push the very tip into the groove last, with a pointed tool, so the cloth closes neatly over the cut.
Outer corners and points
A sharp point, such as a leaf tip, has the opposite problem. Two edges meet and their allowances overlap. Tuck one side of the point fully. Fold the leftover corner cloth flat, trim away the bulk if it is thick, and then tuck the second side over it. The fold should disappear into the groove instead of standing up beside it.
Small pieces and details
Small pieces are the most fragile part of any picture. Cut them with the allowance but trim it down sooner than on large pieces. Tuck them with a pointed tool and avoid repeated pressure on the same spot. A tiny piece that keeps coming loose often sits in a groove that has been widened by earlier work. A drop of fabric glue under the center can help, but it should support the groove rather than replace it.
Eyes and other expressive details benefit from extra care. Tuck the surrounding face first, then place the detail. Its edges should be firm and even because a slightly uneven eye changes the whole expression.
Keep the fabric flat as you go
Before tucking the final edge of a piece, run a finger across the surface. If there is a wave or a bubble, release the nearest edge and smooth the cloth toward it again. A piece should be smooth but not stretched. Over tensioned fabric pulls on its edges and can drag them out later.
Pay attention to the grain. Stable woven cotton is easiest when its threads run with the main direction of the piece. The fabric cutting sheet lets you choose a grain direction for that reason. A piece placed on the bias can stretch out of shape while you push it in.
When two pieces share a groove
Most grooves receive two fabrics. When you tuck the second piece, do not try to push it deeper than the first. Let it sit beside the first edge. If the groove feels full, trim the second allowance narrower rather than forcing it, because forcing it pushes the first fabric back out.
At junctions, where three or more pieces meet, push each fabric only into the end of its own groove. Avoid repeatedly working the center of the junction. That widens it and makes a small hole that is difficult to hide.
A short checklist for each piece
- The cut piece covers its section with allowance on every side
- The first push is on a calm edge, not at a corner
- Opposite sides are anchored before you work around the shape
- Relief cuts are made only at inner corners and stop short of the line
- Excess is trimmed after the edge is held
- The surface is smooth before the last edge goes in
- The finished piece is ticked off on the numbered print
Tucking rewards patience more than force. Treat the first project as practice, keep the pieces calm and generous, and let the board do the holding. After a few pictures the motion becomes automatic and you can spend more attention on fabric choice instead of technique.
For photo tutorials of the tucking motion, see Sewing by Sarah and Rebecca Mae Designs. Their tools and working order differ slightly. Try both and keep what suits your board.
Ready to make something
Turn your own image into a printable pattern
Upload an image and let the generator prepare the color areas, numbered pieces and print layout.
Create a pattern